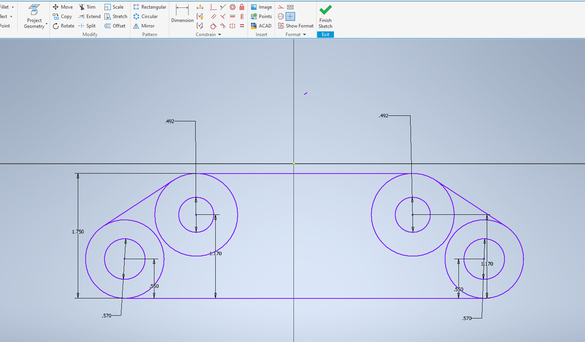
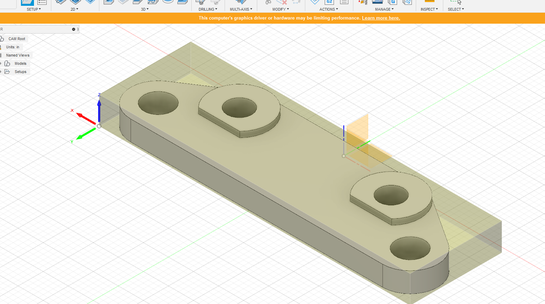
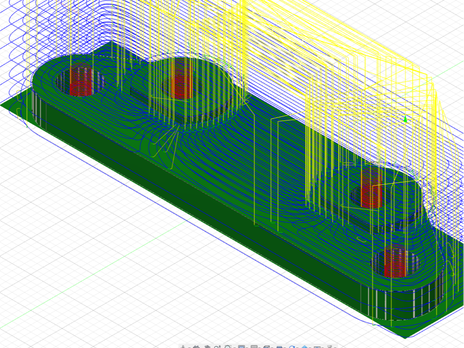
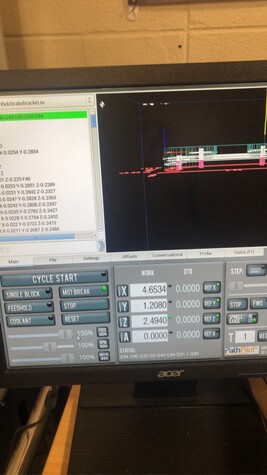
Step: 1 Make your break bracket sketch. Step: 2 Extrude and add the top circles Step: 3 Put your file into Fusion and change the x,y and z axis plane Step: 4 Generate your tool paths for fusion to put your file on the CNC Mill Step: 5 Simulate Your tool paths to make sure it is correct then export and head down to the CNC mill Step: 6 Set up your file on the machine by loading your file into G-Code for the computer and machine to communicate
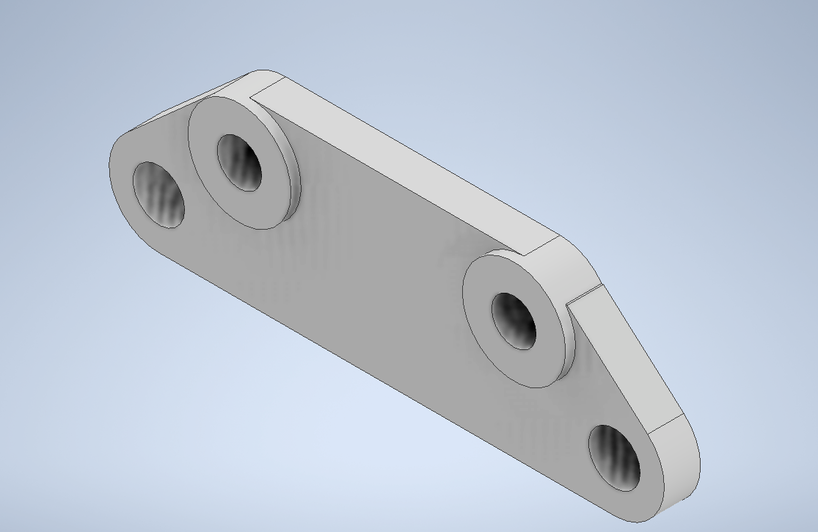
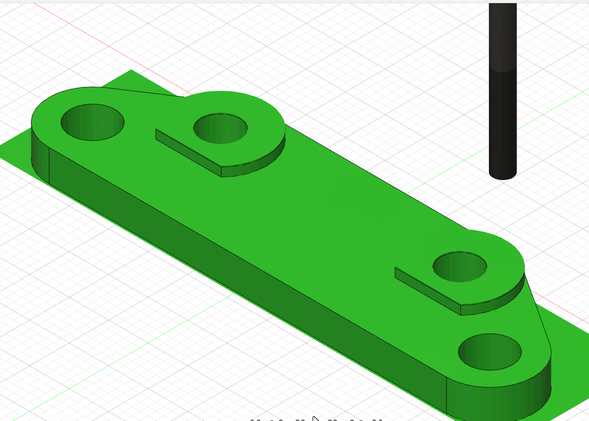
A picture of the final product
Summary Paragraph Overall in this unit we had a lot of new material that was introduced that was confusing at the start but as time went on it got better and better and I eventually got to learn the software's very well as well as understanding the machine software's. What I enjoyed most about this unit is the software was much more interesting and complex than the other software's. One thing I didn't like is that how many people were waiting to use the mill and every time I checked they were both being used.